Friday, July 31, 2020

Odds and Ends

Don't forget to change your rotary blade! I realized I was working entirely too hard to trim up my fabric and quilt blocks. It was time for a new rotary blade. Happiness is a new rotary blade.
I had an abundance of half-used Knit Picks Felici that needed to be wound into balls. This is when I love my Stanwood Needlecraft large ball winder. When I bought it I thought it an extravagance but it really is the last ball winder am I likely to ever buy so it was totally worth it.
I even cranked another pair of monster socks this week. I'm going to have start selling these or I will be overrun with socks!

Tools and supplies (affiliate links):
Sewing and quilting
Creative Grids 6.5" x 24.5" Rectangle
Fiskars Rotary Cutter
Fiskars Self Healing Rotary Cutting Mat
BLACK+DECKER Classic Steam Iron
Grabbit Magnetic Pin Cushion
Fiskars 8-inch scissors
Juki TL-2010Q

Knitting and crochet
Stanwood Needlecraft large ball winder
Knit Picks yarn swift

Wednesday, July 29, 2020

Cranky Socks: Monster Socks

The view from my cranking chair. It doesn't look very scrappy from here. I make these colorful, scrappy wonders (some people call them monster socks) using two or more colorways of self-striping yarn. I mostly buy Knit Picks Felici. Felici is released in limited colorways throughout the year. This means the colors I have are likely no longer available. Sometimes the yellows (or greens, or whatever) from two different colorways line up. This is completely by accident.
When I knit these, I lost count on  the one of the right. It is four rows shorter than the other sock. I had to knit another sock so I would have a pair of the right size.
Here is my replacement sock. Like a replacement player, only it keeps your feet warm. The only way you know you have a pair of monster socks is that the cuffs match. Depending on how much yarn I have I might make the toes match, too. I think I need more solids. 
I also knit up these using a coordinating solid for the cuffs, heels, and toes. These came out great!
I finished both of these on Sunday while I listened to the radio. I can Kitchener the toes closed on a pair of socks in about 30 minutes. 
Then, I printed my custom labels (with the care instructions from the yarn on the inside) and wrapped them up. It is nice to have a few pairs of these on-hand for my sock-loving friends.

Making these on the circular sock machine is possible because I have these two optional attachments for my machine. I'm never going back to the stock yarn carrier. Split is the way to go.

Tools and supplies (affiliate links):
Fiskars 7 Inch Softgrip Student Scissors (snipping yarn)
5 Pieces 5 Different Size Bent Latch Hook Crochet Needle Hook (picking up dropped stitches)
Cable Clamp PRO Cable Management 4 Pack (used in place of weight buckle)
Brightech Lightview Pro Flex - Hands Free, Magnifying Glass Desk Lamp for Close Work (lens removed)
Zibra PB100LZR Grip-n-Glide 1-Inch Round Trim Paint Brush (to clean lint/dust from machine)
24 Pack Metal Rectangular Empty Hinged Tins (hold extra machine needles)
addi Express Hook (picking up dropped stitches, hanging setup bonnet, finishing missed stitches)
Do4U Drinking Home Office Table Desk Side Huge Clip (I use it to hold the ball/cake of yarn while I crank but it could hold your drink, too)
BLACK+DECKER WM225-A Portable Project Center and Vise (this is my machine stand, slightly modified for a larger work surface)
RuMe Bags Baggie All (Aspen) (to hold my hand-finishing supplies: yarn needle, needle threader, scissors, Kitchener directions, stitch markers, etc)

Monday, July 27, 2020

Scrappy Quarter Cabin

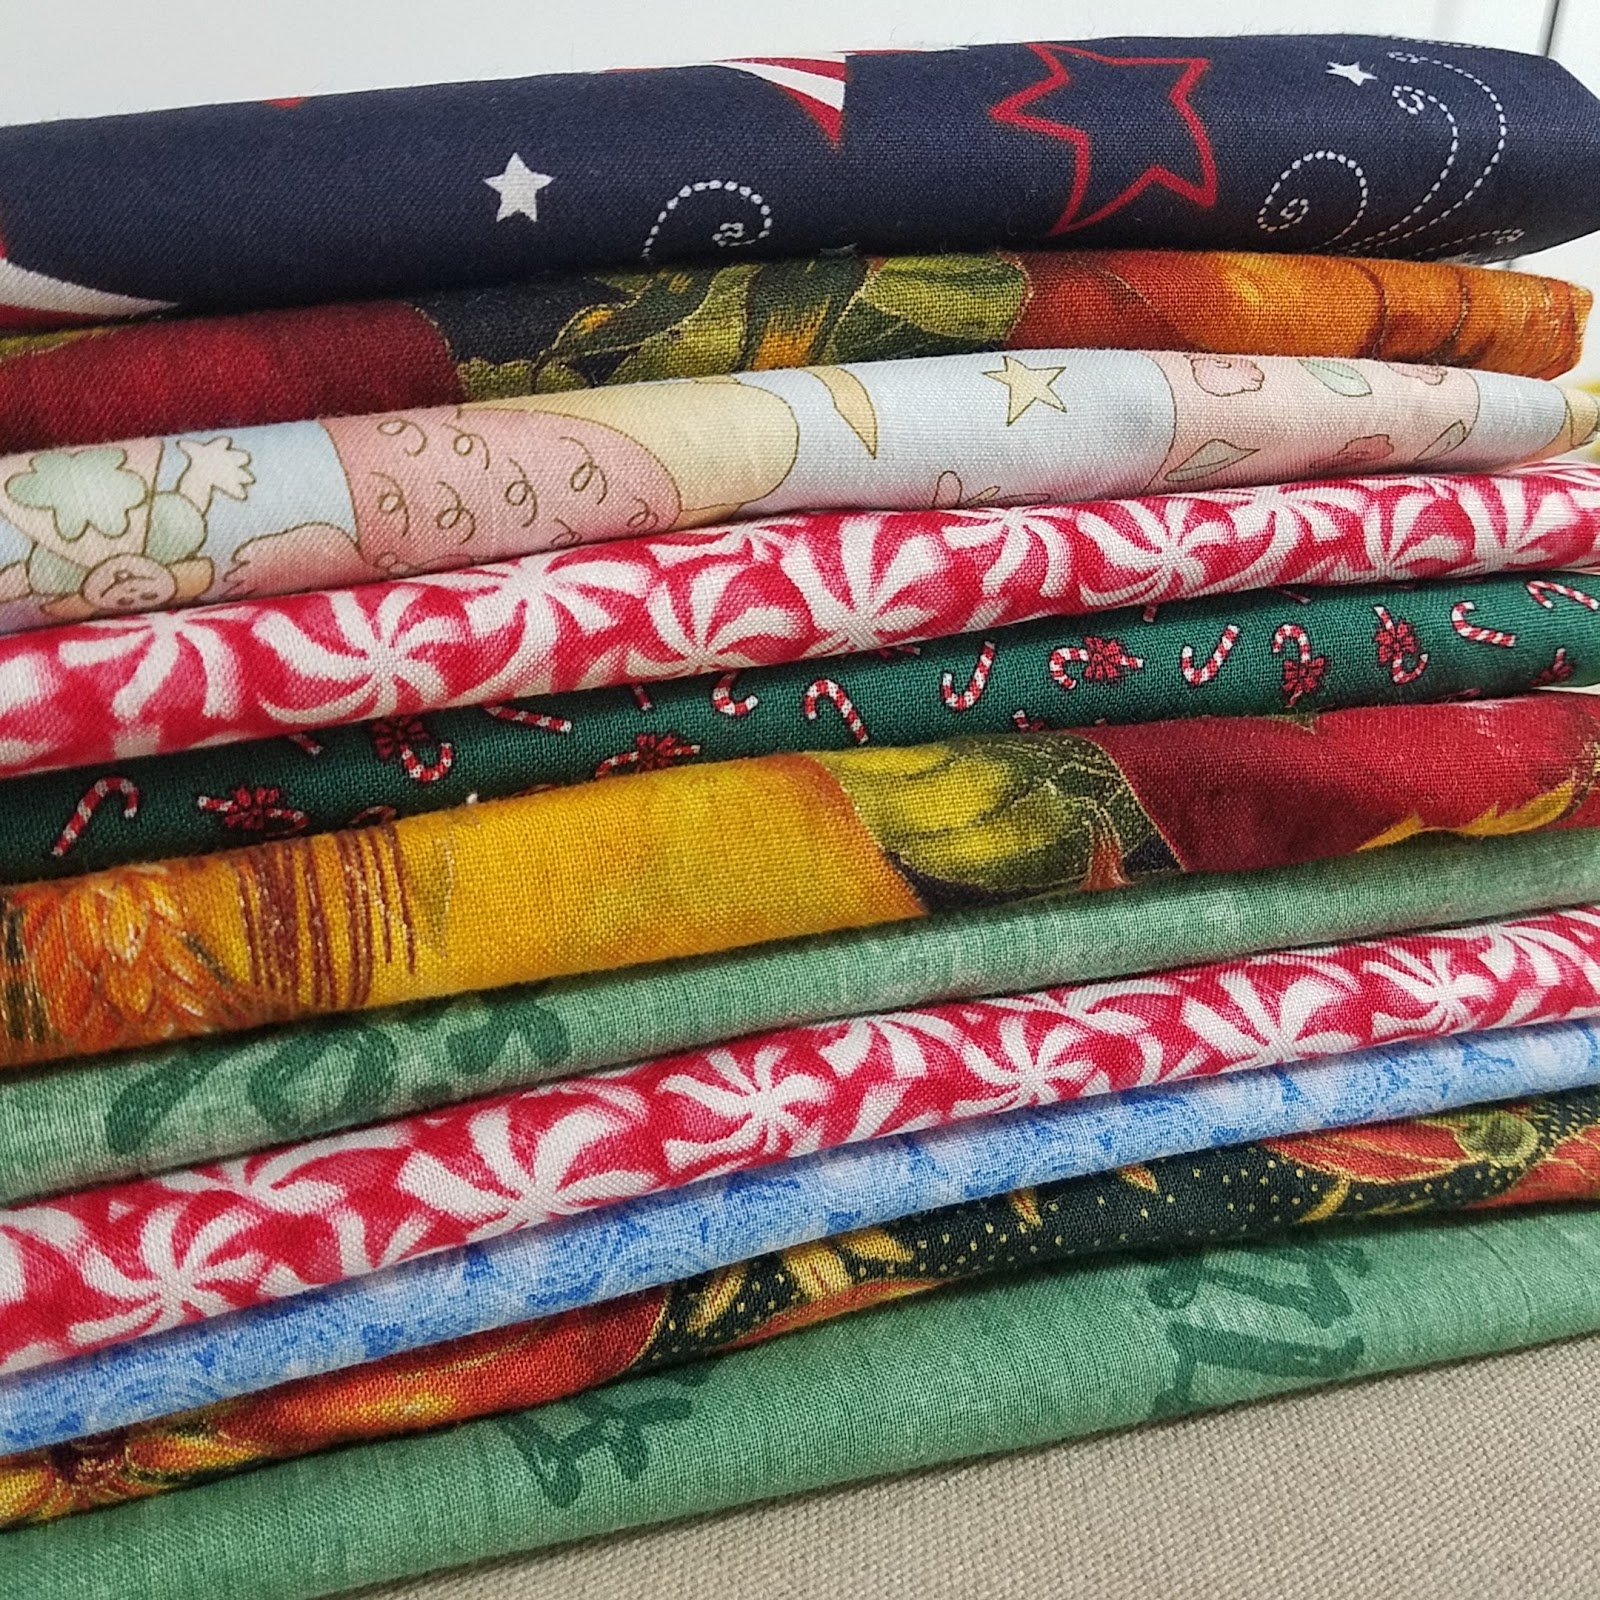
Friday I pulled this stack of fabric from the shelves of my fabric collection. These will be the the beginning of my Scrappy Quarter Cabin using the free and fun tutorial by Christina Cameli. You should check it out.
The first step was to cut some of those fabrics into 5" squares. I also grabbed some from my ridiculously tall stack of 5" squares to add some more variety. Pull in the three bins full of scraps and I was off and running on Saturday morning. 
I started sewing strips and crumb strips to the blocks and by lunch on Saturday I had... well, this one block. I haven't decided if this one will make it into this quilt. I wasn't aiming for pink but there it is.
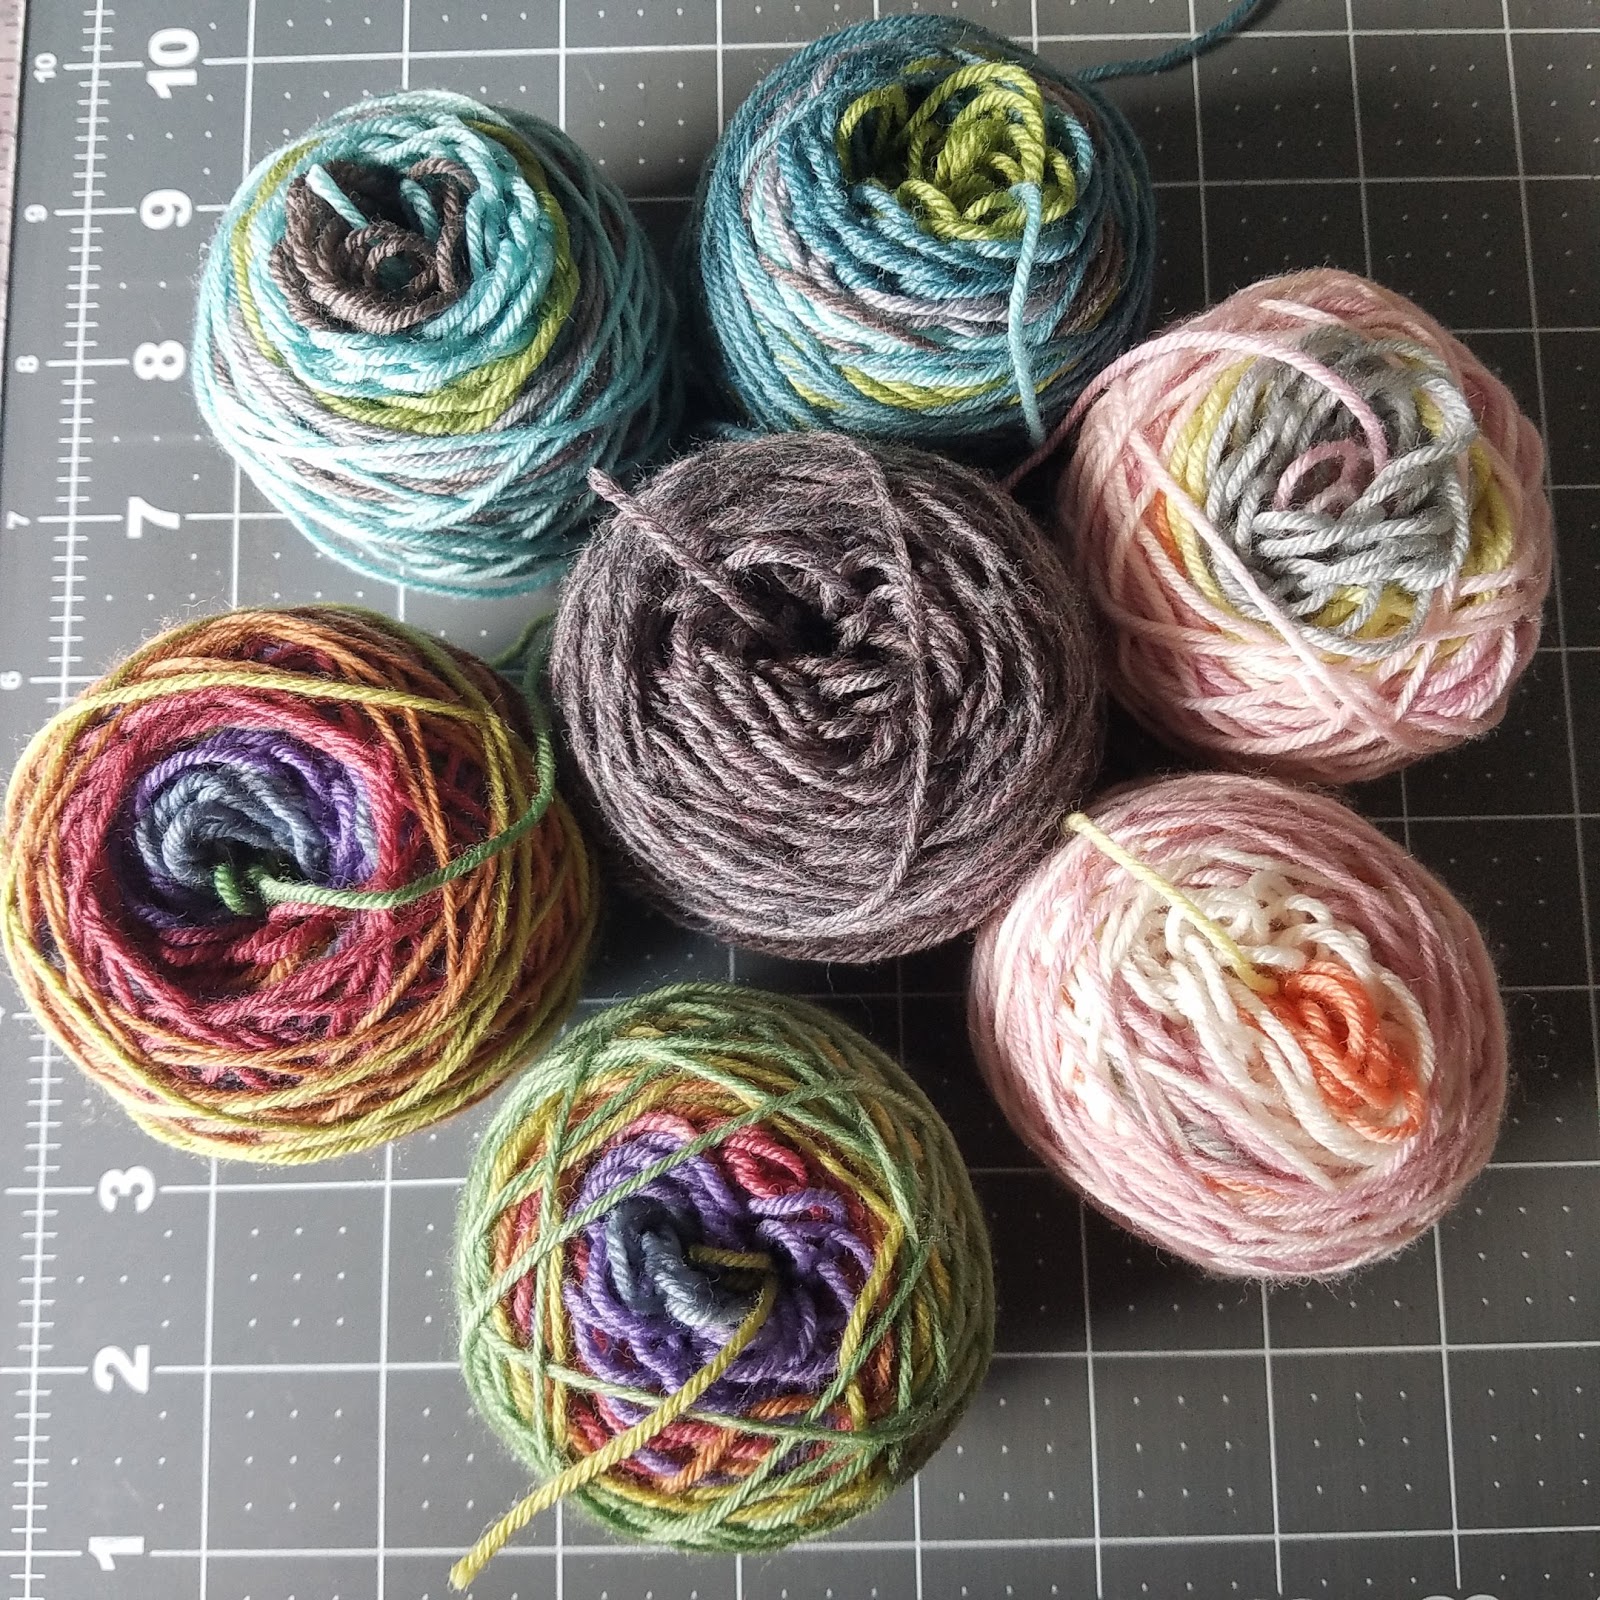
All that careful organization is now this mess next to my sewing machine. I may have more scraps than I can realistically use in my lifetime. It is nice to use some of those scraps in a project. It makes me feel slightly better about holding onto them. 
Here is the pile of trimmings for the first 20 or so blocks. You can get a sense of the color "rules" I"m using for this quilt. At this point I don't know if my strips will hold out long enough to stick to those "rules".
What rules? Well, when I do improvisational piecing I like to come up with a few rules to help the project have cohesion (this is not my original idea, many improv quilt teachers will tell you this). If you look back at the fabrics I chose for the corner blocks you will see grays, creams, minty green, light turquoise and light blue. Then, I pulled crumbs and strips from lights, including yellow and tan. Then I pulled crumbs and strips from blues, greens, and browns in many values. For the most part, I left out reds, oranges, purples, and pinks. Sometimes a little pop of orange, or skinny strip of black, makes an appearance. Of course, if I start to run low on blues and greens I'm going to have to start working with the colors I left out. This by no means a tragedy. In the end, I will have a quilt. It just may become more scrappy than I see right now. I do wonder if I have enough lights to make this work.
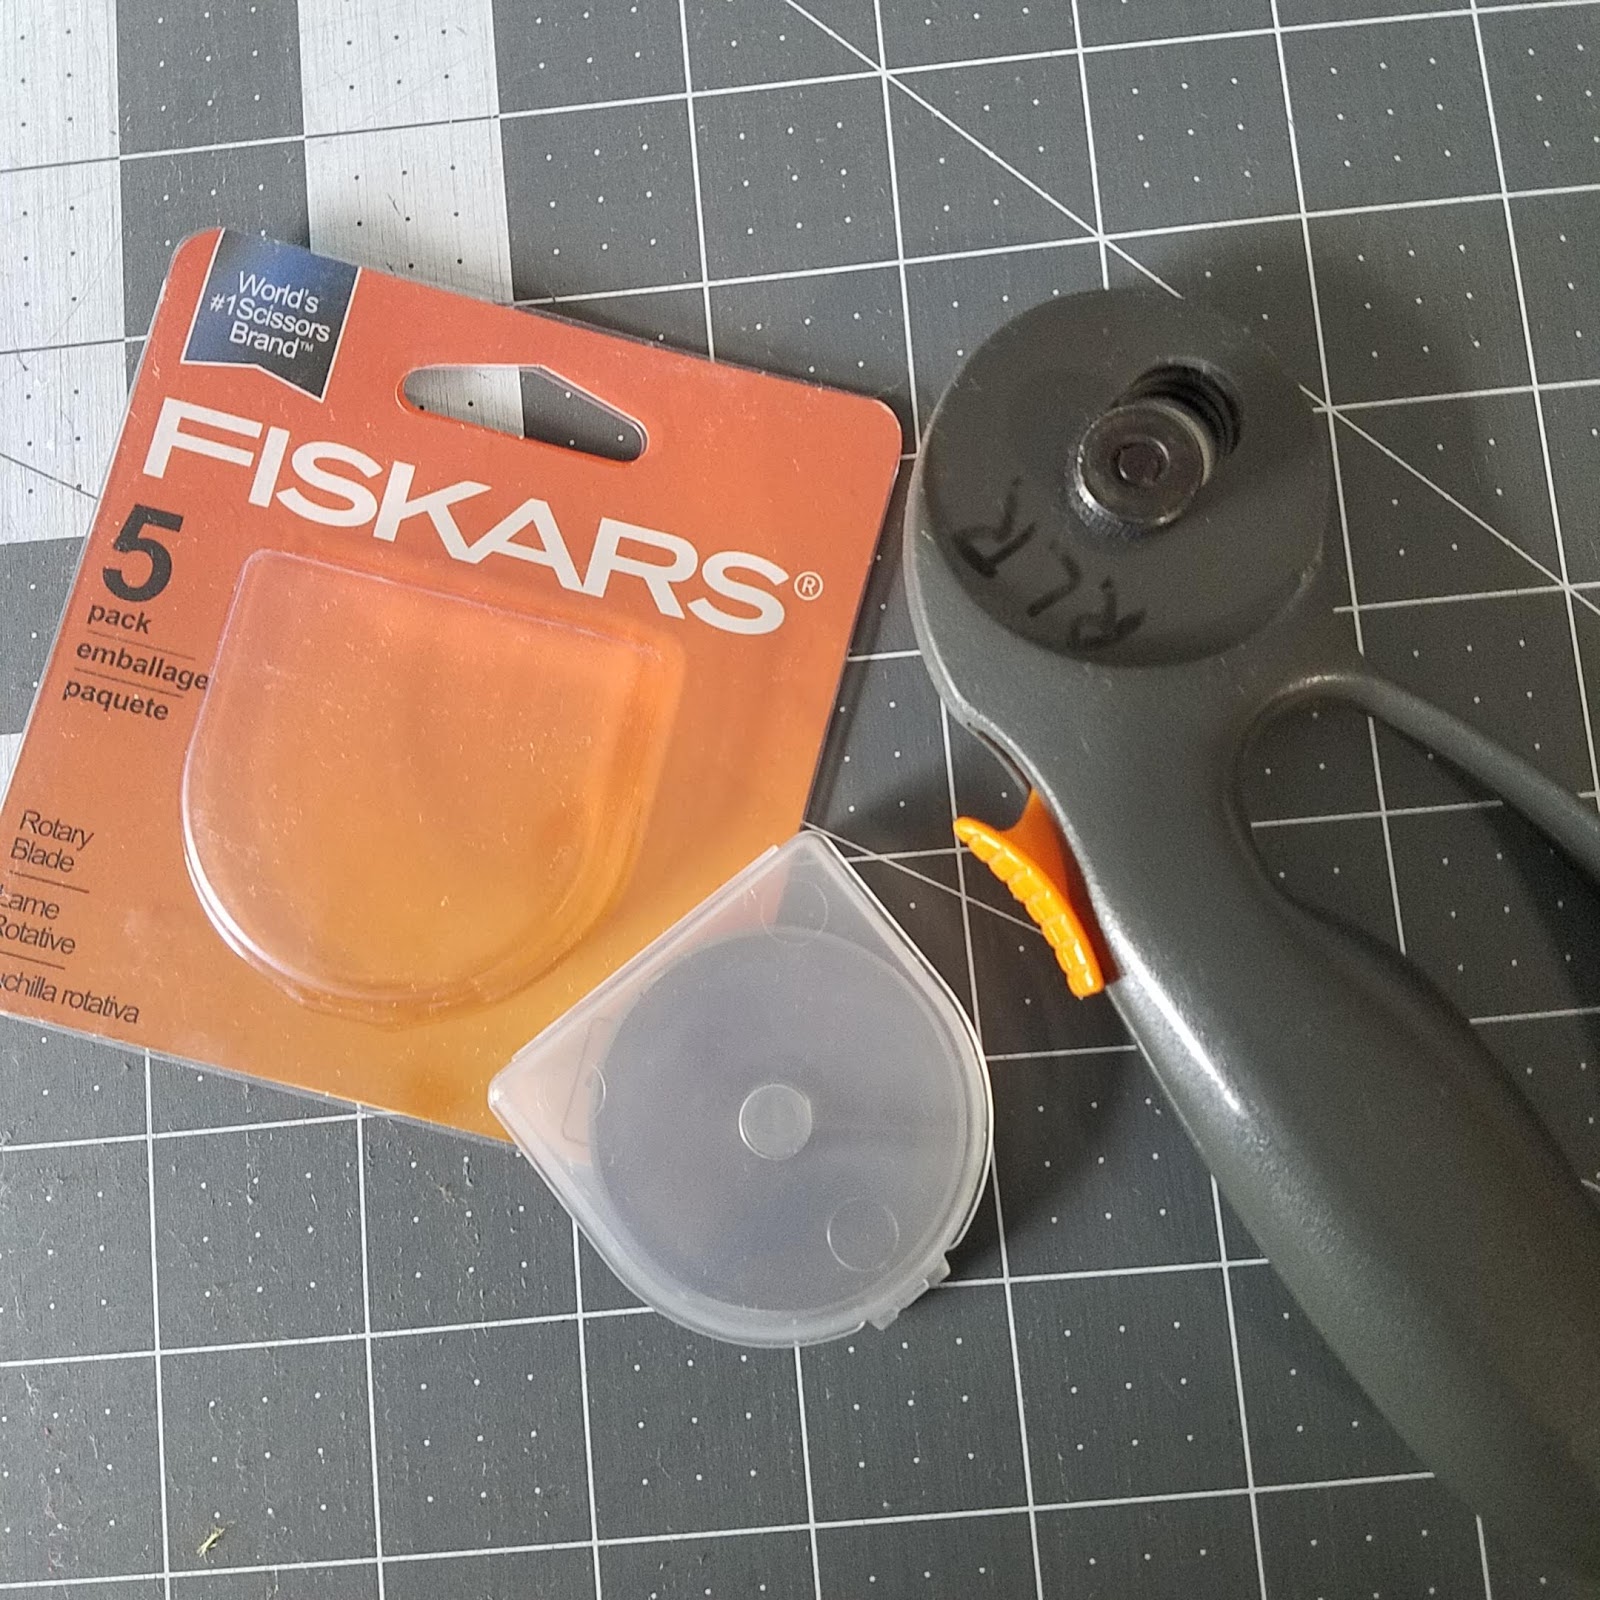
Tools and supplies (affiliate links):
Creative Grids 6.5" x 24.5" Rectangle
Creative Grids 6.5" Square Ruler
Creative Grids 4.5" x 12.5" Rectangle Quilting Ruler
Fiskars Rotary Cutter
Fiskars Rotary Cutter replacement blades
Fiskars Self Healing Rotary Cutting Mat
BLACK+DECKER Classic Steam Iron
Grabbit Magnetic Pin Cushion
Fiskars 8-inch scissors
Juki TL-2010Q
Quilt design software: Electric Quilt (used in this instance to calculate the number of blocks I would need for the size quilt I want to make)

Friday, July 24, 2020

Quilting Book Review

It isn't often I add another book to my collection. It is even more rare for me to write a review about one of those books. Today I want to tell you about Step-by-Step Texture Quilting: 65 New Free-Motion & Walking-Foot Designs (affiliate link) by Christina Cameli. I first heard of Christina Cameli when I was still active on Craftsy and Bluprint. There I watched a couple of her classes and enjoyed both. I recently received a little nudge from Sam Hunter of Hunter Design Studio either via social media or from her subscriber list. I looked up this book and placed my order. (Full disclosure: I purchased this book with my own money and received no compensation for writing this review.)
This cover, front and back, makes me want to quilt up some of this texture. I suddenly have more quilting ideas than quilts. That is a good problem to have.
Each design is clearly explained with both line drawings and quilted examples. I can't imagine working up all these samples to photograph. Every design has step-by-step instructions and direction arrows when needed. Perfect for both beginners and beyond.
My favorite thing about this book is the photographic index in the back. I need to be able to see the designs quickly so I can make a selection without paging through the entire book (though sometimes I do anyway because I have quilter's block). This way I can see the design as it would be stitched out and turn to the applicable page. Brilliant!

If you want to see what else Christina has to offer, check out her website. You will get a free pattern for signing up to her email list. She offers free tutorials and you can buy her books, patterns, and fabric. You will also find links to her blog and free YouTube videos of her quilting.

Free-motion Quilting Books in my Library (affiliate links):
Step-by-Step Texture Quilting: 65 New Free-Motion & Walking-Foot Designs - Christina Cameli
Free-Motion Quilting Idea Book: • 155 Mix & Match Designs • Bring 30 Fabulous Blocks to Life • Plus Plans for Sashing, Borders, Motifs & Allover Designs Spiral-bound 
Free-Motion Quilting with Angela Walters: Choose & Use Quilting Designs on Modern Quilts
Beginner’s Guide to Free-Motion Quilting: 50+ Visual Tutorials to Get You Started • Professional-Quality Results on Your Home Machine
Shape by Shape Free-Motion Quilting with Angela Walters: 70+ Designs for Blocks, Backgrounds & Borders
Shape by Shape, Collection 2: Free-Motion Quilting with Angela Walters - 70+ More Designs for Blocks, Backgrounds & Borders
Graffiti Quilting: A Simple Guide to Complex Designs (no longer available through Amazon but you can buy it directly from the designer)
Quilting Modern: Techniques and Projects for Improvisational Quilts

Wednesday, July 22, 2020

Dotted Rays Progress

Just a quick update on my most recent Dotted Rays. I added the second ball of yarn from Yarn Hero. Shifting blues in a colorway called Video Game. I'm changing colors in an attempt to blend them with bold stripes and using more stripes of the contrast color to create more blocks of color. I'm loving how it is working up. The next wedge should really show this effect.
I shifted to the 60" cable for this photo. This is likely the last time it doesn't look like a lumpy mess when I take a picture. I am so happy with how this is turning out.

Tools and Supplies (affiliate links):
Needles: Knit Picks Options Wood Interchangeable Knitting Needle Set - US 4-11 (Sunstruck)
Blocking mats: Balance From Puzzle Exercise Mat with EVA Foam Interlocking Tiles
Blocking wires: Knit Picks Lace Blocking Wires & T-Pins
Knit blockers: Knitter's Pride Knit Blockers & Pin Kit
Stitch markers: CLOVER Lock Ring Markers 20/pkg

Monday, July 20, 2020

Star Struck

I picked up this panel by Anthology Fabrics a couple years ago at a quilt show. It has been waiting around in my collection for me to get up the nerve to quilt it. Since I completed my Dream Big panel I figured I had enough confidence to give it a go.
While I complete expected variance from the package print, I did not expect it to be this different. Granted, it didn't change that I was going to quilt it, it was just kind of surprising how much my panel did not match the package photo.
I decided to let the quilting really show on this one and pulled out a bunch of coordinating colors in Fantastico and Magnifico by Superior Threads. This poly thread has great shine perfect for machine embroidery and sometimes works as a great top thread when machine quilting. Paired with Bottom Line in the bobbin. 
I loaded, basted, and looked at the center of the quilt. I wanted to work from the center out. 
I created some large pebbles and echoed closely around each. I used the dye pattern to guide me and keep everything mostly balanced. 
A couple big swirls mirrored on the top, bottom, and sides got me really moving. My swirls may not be perfect but in the overall view that doesn't matter all that much. 
I created a background for those swirls. 
I squared off with echoes and another large pebble. So simple and really effective. 
I replicated the stripes for the second to last round. This will create a sort of background for the center motifs. I used a wavy echo for the last round trying to add some organic texture to break all those straight lines. 
Here is a view of the back of the quilt. It isn't easy to see the texture on the front but you can really see it here. 
Trimmed and ready for binding and a hanging sleeve. I'm really having fun exploring more quilting and less piecing. Not that I don't want to piece any more, just that I like adding to my quilting toolbox.

Anthology Fabrics Cube-Bori panel (non-affiliate)

Tools and supplies (affiliate links):
Fiskars Micro-Tip Scissors, 5 Inch
Creative Grids 6.5" x 24.5" Rectangle
Fiskars Rotary Cutter
Fiskars Self Healing Rotary Cutting Mat
BLACK+DECKER Classic Steam Iron
Grabbit Magnetic Pin Cushion
Fiskars 8-inch scissors
Juki TL-2010Q

Free-motion Quilting Books in my Library (affiliate links):
Free-Motion Quilting Idea Book: • 155 Mix & Match Designs • Bring 30 Fabulous Blocks to Life • Plus Plans for Sashing, Borders, Motifs & Allover Designs Spiral-bound 
Free-Motion Quilting with Angela Walters: Choose & Use Quilting Designs on Modern Quilts
Beginner’s Guide to Free-Motion Quilting: 50+ Visual Tutorials to Get You Started • Professional-Quality Results on Your Home Machine
Shape by Shape Free-Motion Quilting with Angela Walters: 70+ Designs for Blocks, Backgrounds & Borders
Shape by Shape, Collection 2: Free-Motion Quilting with Angela Walters - 70+ More Designs for Blocks, Backgrounds & Borders
Graffiti Quilting: A Simple Guide to Complex Designs (no longer available through Amazon but you can buy it directly from the designer)
Quilting Modern: Techniques and Projects for Improvisational Quilts
Step-by-Step Texture Quilting: 65 New Free-Motion & Walking-Foot Designs by Christina Cameli

Friday, July 17, 2020

Totes Totes

I've been digging through my fabric and pulling out pieces I think will work for masks. When I find pieces big enough to make totes (about 1/2 yard of fabric per tote) I press it and set it aside. I did that all week. 
I sat down to assemble them on Sunday. I didn't even count them first. 
When I sew these I move through them rather quickly, sewing a piece and dropping it beside me. 
Assembly-line sewing at its finest. These are constructed using my serger then finished on the Juki. 
They do stack up nicely. 
Eleven totes finished! I stack these up and use them to gift things. They are great to give away almost anything and the recipient then has a reusable tote for groceries. Win-win in my book. Mostly seasonal in this group.

Free pattern by The Green Bag Lady.

Tools and supplies (affiliate links):
Creative Grids 6.5" x 24.5" Rectangle
Fiskars Rotary Cutter
Fiskars Self Healing Rotary Cutting Mat
BLACK+DECKER Classic Steam Iron
Grabbit Magnetic Pin Cushion
Fiskars 8-inch scissors
Juki TL-2010Q

Wednesday, July 15, 2020

Dotted Rays

I have hoarded this great yarn from past year's Maryland Sheep and Wool Festivals long enough. It was time to cast on another Dotted Rays and get knitting. 
This yarn is by Hobbledehoy Yarn + Fibers. I saw it at the festival and had to have it. 
The pink/purple/blend is an amazing yarn by Yarn Hero. I love yarns like this.
The constantly changing colors just make me happy! I love knitting this shawl.


Tools and Supplies (affiliate links):
Needles: Knit Picks Options Wood Interchangeable Knitting Needle Set - US 4-11 (Sunstruck)
Blocking mats: Balance From Puzzle Exercise Mat with EVA Foam Interlocking Tiles
Blocking wires: Knit Picks Lace Blocking Wires & T-Pins
Knit blockers: Knitter's Pride Knit Blockers & Pin Kit
Stitch markers: CLOVER Lock Ring Markers 20/pkg

Monday, July 13, 2020

More Masks

Every time I think I have made enough masks I realize my work isn't done.
No matter how many I make I continue to find fabrics that are just too much fun and friends and family who need more masks.
I use the free mask pattern from Craft Passion. I want to keep the Halloween prints for myself. 
I cut the elastic for medium masks to 7.5" long. 
I cut the elastic to 8.5" for large masks. So many fun fabrics.

Articles (updated July 2020)
Centers for Disease Control and Prevention (CDC): Use of Cloth Face Coverings to Help Slow the Spread of COVID-19
NPR: A User's Guide To Masks: What's Best At Protecting Others (And Yourself) 
NPR: Widespread Use Of Face Masks Could Save Tens Of Thousands Of Lives, Models Project 
World Health Organization: Coronavirus disease (COVID-19) advice for the public: Mythbusters

Mask Patterns
Domesticity Fabric Shop (three free patterns linked)
Craft Passion (my preferred pattern, includes video tutorial)
Delectable Mountain Quilter's Guild (several tips, patterns, and references)

Tools and supplies (affiliate links):
Creative Grids 6.5" x 24.5" Rectangle
Creative Grids 6.5" Square Ruler
Creative Grids 4.5" x 12.5" Rectangle Quilting Ruler
Fiskars Rotary Cutter

Friday, July 10, 2020

Sewing Machine Gifting

A coworker asked for a recommendation on a sewing machine. I said I could give him a sewing machine. All I had to do was dig around and find one.
I dug around in the attic and pulled out this winner. Winner because it works, and has most of the parts. I did some sample sewing to make sure all the stitches worked.
I couldn't find the spool pin cap (this one is from my Juki). But it isn't strictly speaking a requirement. He should be able to get one aftermarket, or 3D printed. In a pinch you can put a rubber band on the spool pin and that will do the job. I also couldn't find the button hole attachment but now often do people really do button holes?
This one even has the manual! I keep some things entirely too long. I scrounged up the right bobbins, some spare needles, and a couple spools of thread. I will get it all boxed up and in the trunk for the next time I see him.

Wednesday, July 8, 2020

In The Hoop

Time to get hooping! My cutting table prior to the real mess. I discovered Off With Their Threads last week. They were having a sale and I couldn't resist picking some fun in the hoop (ITH) projects. I grabbed my tear-away stabilizer and hooped it up.
I decided to use this lime green vinyl I picked up at one of the big box fabric stores a while back. The strap for the claw clasp was a leftover from another project. This is the step in the project I realized I had taped it onto the work the wrong way. I grabbed my seam ripper and got that sorted out. 
I taped down the clasp before the final stitch out just to be sure the needle wouldn't hit it. 
Trimmed and ready for the final steps on the sewing machine. This project is not completely in the hoop but the last couple seams are quick on the machine.
Such a cute little pouch! I want to buy so many different printed vinyls so I can make more of these. 
Lined with a fun printed felt. 
What do you do with such a little pouch? Well, you stuff two or three face masks into it so you will always be prepared. 
Fun little project! I think I should make a couple more. Great to hang on your key ring or handbag.

Machine embroidery design: Off With Their Threads Mini Backpack

Tools and supplies (affiliate links):
Creative Grids 4.5" x 12.5" Rectangle Quilting Ruler
Fiskars Rotary Cutter
Fiskars Self Healing Rotary Cutting Mat
BLACK+DECKER Classic Steam Iron
Grabbit Magnetic Pin Cushion
Craft Clips with Tin Box Package, Pack of 100
Fiskars 8-inch scissors
Juki TL-2010Q
Magna-Glide bobbins (absolutely the best for my embroidery machine)
KAM snaps
Pellon Stitch-N-Tear, 20" by 30 yd, White
Premium Metal Lobster Claw Clasps - Wide 3/4 Inch D Ring