Showing posts with label log cabin. Show all posts

Monday, February 14, 2022

Scrappy Quarter Cabins

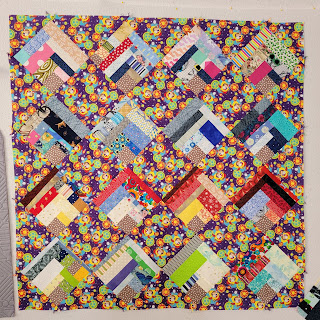
I pieced up more scrappy quarter cabin blocks until I had enough to make a small quilt. 
Then I cut some busy fabric for the alternate blocks and setting triangles. 
To tone down some of that business, I picked this bright yellow border fabric. I think it frames the work quite nicely. Then I quilted it with a fun geometric meander. Now all it needs is some binding. 

I will share my list of tools below, if you want check them out. These blocks are really easy and fun to make. The rotating mat is not a requirement but it is nice to have for squaring up these blocks. I also use spray starch when pressing so the blocks will stay nice and flat until I assemble the quilt. 

Wednesday, January 26, 2022

Scrappy Quarter Cabins

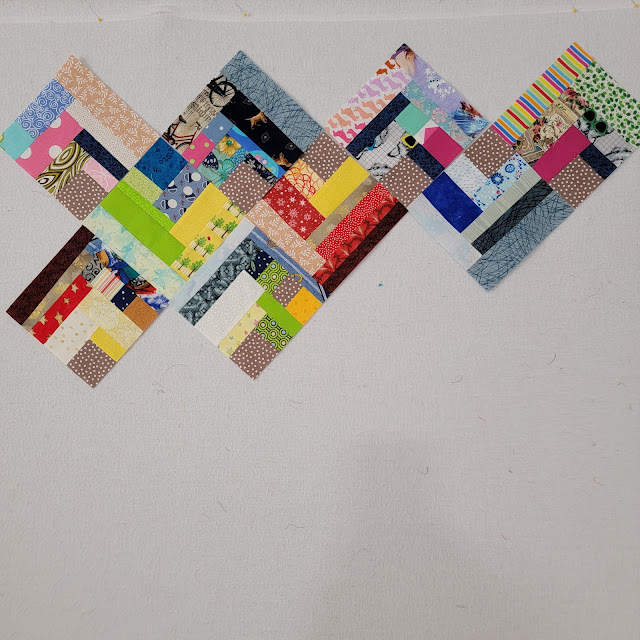
I have a big bag of scraps left over from making charity quilts. I wanted some simple sewing so I decided to make some Scrappy Quarter Cabins. I learned this technique from Christina Cameli on her blog A Few Scraps. If you need more help than you like, there is also an online course. Nine blocks is a good start!
I'm sure I will be making these for a while before I have enough for a small quilt. I made a large one in August 2020 you can read about in this post

I will share my list of tools below, if you want check them out. These blocks are really easy and fun to make. The rotating mat is not a requirement but it is nice to have for squaring up these blocks. I also use spray starch when pressing so the blocks will stay nice and flat until I assemble the quilt. 

Wednesday, August 26, 2020

Scrappy Quarter Cabin

Part 4: the scrappy finish.
I planned on trimming this quilt last week but didn't get around to it until Saturday. I cut my borders at 2.5" then trimmed them down after quilting. This helps me keep the border consistent all the way around after quilting.
I pulled out a bunch of 2.5" strips to make a scrappy binding. Scrappy bindings are generally my favorite and this was no different.
Such a happy scrappy binding! I even added a few more pieces before I was done.
I do love some swirls!
I finished the binding by machine because this quilt is going to get used. And, I wanted to be finished without having to sit under a quilt in the heat.
It is a great quilt! A special thank you to Christina Cameli and her blog A Few Scraps for this fun and free tutorial. I highly recommend her book Step by Step Texture Quilting. You can read my review in this post from July 2020 or check out the books section of her website to buy directly from the author.

Scrappy Quarter Cabin Part 1
Scrappy Quarter Cabin Part 2
Scrappy Quarter Cabin Part 3

Tools and supplies (affiliate links):
Creative Grids 6.5" x 24.5" Rectangle
Creative Grids 6.5" Square Ruler
Creative Grids 4.5" x 12.5" Rectangle Quilting Ruler
Tucker Trimmer III
Fiskars Rotary Cutter
Fiskars Rotary Cutter replacement blades
Fiskars Self Healing Rotary Cutting Mat
BLACK+DECKER Classic Steam Iron
Grabbit Magnetic Pin Cushion
Fiskars 8-inch scissors
Juki TL-2010Q
Quilt design software: Electric Quilt (used in this instance to calculate the number of blocks I would need for the size quilt I want to make)

Wednesday, August 19, 2020

Scrappy Quarter Cabin

Part 3
Some projects take longer than others. This was part of the cost of creating this quilt. Little scraps and strips all over my sewing side-table. Once I had all my blocks I put these scraps back in the bins for another day. 
Another cost was the leftovers. These are the pieces too small to sew into larger pieces. My trimmings are always small like this. These will be added to my pet bed donation trash-bag for the next time I get to give those snips away to the gentle souls who make pet beds for local shelters.
The final layout was something like this. A few blocks got moved about in the assembly process.
I always feel like assembling a quilt with on-point blocks takes forever! It doesn't, it just seems that way. 
I added a mostly solid border to stabilize all those edges. With the bias for the majority of the quilt running the length and width of the quilt it can be challenging to keep it from shifting about. Adding a border stabilizes the overall piece and keeps me from stretching those edges. It also gets me to square before quilting. The next step is quilting. So many decisions!

Scrappy Quarter Cabin Part 1
Scrappy Quarter Cabin Part 2

Tools and supplies (affiliate links):
Creative Grids 6.5" x 24.5" Rectangle
Creative Grids 6.5" Square Ruler
Creative Grids 4.5" x 12.5" Rectangle Quilting Ruler
Tucker Trimmer III
Fiskars Rotary Cutter
Fiskars Rotary Cutter replacement blades
Fiskars Self Healing Rotary Cutting Mat
BLACK+DECKER Classic Steam Iron
Grabbit Magnetic Pin Cushion
Fiskars 8-inch scissors
Juki TL-2010Q
Quilt design software: Electric Quilt (used in this instance to calculate the number of blocks I would need for the size quilt I want to make)

Wednesday, August 5, 2020

Scrappy Quarter Cabin

Part 2
I sat down to this mess on Saturday morning to make some more blocks for my Scrappy Quarter Cabin quilt.
I also stitched up some binding for my quilt Star Struck. You can't see the binding in this photo but I can assure you it is attached. I wanted to share another closeup look at the quilting on this one. 
The pile of trimmings for this one is getting quite large.
I played with block placement and flipped some around a little. I really like how this one is working up. Still so much to do. I still need about 17 blocks before I'll be ready to make the setting triangles. I haven't decided if I will make them in a solid fabric or carry on with more scrappy piecing. I've got time to think about it. Looking at it here, I think I might rearrange some of those darker blocks to make them stand out more. 

What are you working on? Scrappy or controlled?

Tools and supplies (affiliate links):
Creative Grids 6.5" x 24.5" Rectangle
Creative Grids 6.5" Square Ruler
Creative Grids 4.5" x 12.5" Rectangle Quilting Ruler
Fiskars Rotary Cutter
Fiskars Rotary Cutter replacement blades
Fiskars Self Healing Rotary Cutting Mat
BLACK+DECKER Classic Steam Iron
Grabbit Magnetic Pin Cushion
Fiskars 8-inch scissors
Juki TL-2010Q
Quilt design software: Electric Quilt (used in this instance to calculate the number of blocks I would need for the size quilt I want to make)

Monday, July 27, 2020

Scrappy Quarter Cabin

Friday I pulled this stack of fabric from the shelves of my fabric collection. These will be the the beginning of my Scrappy Quarter Cabin using the free and fun tutorial by Christina Cameli. You should check it out.
The first step was to cut some of those fabrics into 5" squares. I also grabbed some from my ridiculously tall stack of 5" squares to add some more variety. Pull in the three bins full of scraps and I was off and running on Saturday morning. 
I started sewing strips and crumb strips to the blocks and by lunch on Saturday I had... well, this one block. I haven't decided if this one will make it into this quilt. I wasn't aiming for pink but there it is.
All that careful organization is now this mess next to my sewing machine. I may have more scraps than I can realistically use in my lifetime. It is nice to use some of those scraps in a project. It makes me feel slightly better about holding onto them. 
Here is the pile of trimmings for the first 20 or so blocks. You can get a sense of the color "rules" I"m using for this quilt. At this point I don't know if my strips will hold out long enough to stick to those "rules".
What rules? Well, when I do improvisational piecing I like to come up with a few rules to help the project have cohesion (this is not my original idea, many improv quilt teachers will tell you this). If you look back at the fabrics I chose for the corner blocks you will see grays, creams, minty green, light turquoise and light blue. Then, I pulled crumbs and strips from lights, including yellow and tan. Then I pulled crumbs and strips from blues, greens, and browns in many values. For the most part, I left out reds, oranges, purples, and pinks. Sometimes a little pop of orange, or skinny strip of black, makes an appearance. Of course, if I start to run low on blues and greens I'm going to have to start working with the colors I left out. This by no means a tragedy. In the end, I will have a quilt. It just may become more scrappy than I see right now. I do wonder if I have enough lights to make this work.

Tools and supplies (affiliate links):
Creative Grids 6.5" x 24.5" Rectangle
Creative Grids 6.5" Square Ruler
Creative Grids 4.5" x 12.5" Rectangle Quilting Ruler
Fiskars Rotary Cutter
Fiskars Rotary Cutter replacement blades
Fiskars Self Healing Rotary Cutting Mat
BLACK+DECKER Classic Steam Iron
Grabbit Magnetic Pin Cushion
Fiskars 8-inch scissors
Juki TL-2010Q
Quilt design software: Electric Quilt (used in this instance to calculate the number of blocks I would need for the size quilt I want to make)

Sunday, November 23, 2014

Quilters Quest - Fourth Day, Final Shop - The Scrappy Apple

The story of my adventures on the Quilters Quest Shop Hop continues:
On the fourth day of shop hopping I grabbed my quilting buddy and we headed out to Virginia.  The last stop on my 2014 Quilters Quest Shop Hop was The Scrappy Apple in Winchester, VA.  This shop is way off the beaten path for me (about two hours from home) but I love how friendly and open Kelly is when I stop in.  Sometimes I can even get Darling Husband to take me because there is a Camping World nearby. 
Kelly had some really amazing quilts hanging up in the shop.  I snapped a few pictures with my phone.  I love the swoon block.  I really should make one at some point.
I'm pretty sure this one is Night Sky by Jaybird Quilts on a white background.  I will have to make one of these someday.
This is the Quilters Quest quilt from the Scrappy Apply.  This is the quilt I've decided to make so this is where I finished quest.
Here is my Quest finishing bag!  Doesn't it look great filled with the last of my loot?
There were some little treats inside.  I also picked up some fat quarters, a postcard pattern and some of the "bolt of the day" fabric.  The last thing on that list is the yards and yards of gray fabric that will become the background for my Quilters Quest quilt.  I'm looking forward to this one!  I think I've stocked up for the long winter months.

Did you participate in a shop hop this year?  Did you find new shops to visit and meet more quilters?

Saturday, November 22, 2014

Quilters Quest - Third Day, Third Shop - Capital Quilts

The story of my adventures on the Quilters Quest Shop Hop continues:

Last Quilter's Quest was the first time I'd been to Capital Quilts in Gaithersburg, MD.  Such a great shop filled with fabric, machines and helpful people.  
This year the Quest quilt is just as stunning as it was last year.  Last year I made their quest quilt and I couldn't be happier with it.  Now, if I could just remember to take it with me one of these times I go down that way!
I was so excited when I found the Super Sidekick by Jaybird Quilts.  As you know I have a bit of a ruler problem.  I have many and I want more.  I used the Sidekick for a mini quilt and had a great experience.  The Super Sidekick was a natural fit.  I also found some more fun fruit and vegetable fabrics to add to my growing pile.  I should come up with a pattern for those soon.

Friday, November 21, 2014

Quilters Quest - Third Day, Second Shop - Jinny Beyer Studio

The story of my adventures on the Quilters Quest Shop Hop continues:

Our second stop of the day was Jinny Beyer Studio.
Jinny's quilts are just amazing.  They play with color intensity in a way that has a finished look that can be breathtaking.  This is the quest quilt.  The applique is beautiful and I know that even if I managed to make the lone star design I would never finish the applique.  The colors are beautiful!
I was overwhelmed and had trouble deciding on the few things I did pick up.  I added some beautifully bright batiks to my stash along with the quest strips and pattern.

Thursday, November 20, 2014

Quilters Quest - Third Day, First Shop - Kelly Ann's Quilting

The story of my adventures on the Quilters Quest Shop Hop continues:
The third day I met my quilting buddy and we headed out to Kelly Ann's Quilting in Warrenton, VA.
Look at this huge selection Halloween and Ghastlies fabric!
I really need to pull out all my Halloween fabrics and make something.  Otherwise I'll just seem like a hoarder.
In the far back room they have so many fun and playful quilts hanging.  I had to snap a couple pictures.
Kelly Ann's had a really good-size collection of American Made Brand solids so I picked eight colors and got a 1/2 yard of each.  I see a solids quilt in my future.  Why is that Wonder Woman fabric in there?  Because sometimes you can send a text and your friend will cry out "buy me a yard!" from a hundred miles away.

Tuesday, November 18, 2014

Quilters Quest - Second Day, Third Shop - Cottonseed Glory Quilt Shop

The story of my adventures on the Quilters Quest Shop Hop continues:

The last stop on the second day was Cottonseed Glory Quilt Shop in Annapolis, MD.  This shop is close enough to home that I visit much more often than some of the other shops.
Cottonseed Glory always has the special "buy 10 fat quarters and get one free."  I never walk out of there will fewer than 11 fat quarters.  This time I picked up some more solids.  How can I call myself a modern quilter if I don't have very many solids?

Monday, November 17, 2014

Quilters Quest - Second Day, Second Shop - Material Girls Quilt Boutique

The story of my adventures on the Quilters Quest Shop Hop continues:

I love this family-owned business.  They are so welcoming and I wish I lived close enough to take classes with them.  Their classroom is great!
The second shop my DH took me to was Material Girls Quilt Boutique.  I'm tickled when I pop and and they say "Welcome back!"  This quilt is hanging in the classroom.  It is the Moda Modern Building Blocks quilt.  I really like it and was hoping to get the block instructions but it seems this only comes as a kit.  I have enough fabric (can you hear The Bitchy Stitcher laughing at me?) so I didn't want to get the kit.  I may have to play with some of my scraps to put together something similar. 
Again I failed to take many pictures.  This one is from the notions wall.  A friend of mine was looking for this ruler and I wanted to let her know where she could find it. Creative Grids rulers are my new favorite for general cutting.  I have two and when I find another I can't live without it will be coming home with me.  This is the 6.5" by 12.5" which is a great size for trimming and smaller cutting.  I also have the 6.5" by 24.5" for cutting width-of-fabric pieces and strips and the 4.5" by 12.5" for smaller cutting.  
Here is my collection of mad loot from Material Girls.  I picked up a small pile of American Made Brand of cotton solids.  This is a nice alternative to Kona Cottons if you want a fabric that is made in the United States from cotton seed to fabric.  I don't have confirmation of this but I've heard from quilting educators that Kona Cotton greige fabrics are created in at least seven different countries.  That can create a great deal of differences in quality of fabric, shrinkage rates and quality of dye and color-fastness.  American Made Brand only has 62 colors to compete with the 303 colors that Robert Kaufman offers but I think supporting U.S. industry is important to my country's economy.

Friday, November 14, 2014

Quilters Quest - First Day, Third Shop - Bear's Paw Fabrics

Next was at Bear's Paw Fabrics in Towson, MD.
This is my mad loot from the last stop of the day.  The strips that are part of the shop hop are light and pretty.  The pattern is great and I'm already planning to make it using my growing pile of batik fabrics.  The rest of the fabrics, all fat quarters, are destined for the Bonnie Hunter Mystery Quilt that starts the day after Thanksgiving.

I'm so very sorry that I didn't take a bunch of pictures this year.  I took pictures of the shops last year because so many of them are new to me.  This year I was so excited about the shopping that I forgot my camera in the care more times than I remembered it.

Thursday, November 13, 2014

Quilters Quest - First Day, Second Shop - Patches Quilting and Sewing

The story of my adventures on the Quilters Quest Shop Hop continues:

On Saturday my quilting buddy and I traveled back towards home by way of Patches Quilting and Sewing in Mt. Airy, MD.  
This shop is packed with fabric and embroidery and more fabric.  
I picked up these great fabrics and the fun pattern for the shop hop.  Look at those sparkling stars!  The paper piecing is taunting me again.  I think I know which pattern I'm going to go with this year when I go to use the strips that are part of the fun shop hop.

This is part of my stocking up for the cold, dark winter months.

Monday, November 10, 2014

Quilters Quest - First Day, First Shop - Traditions at the White Swan

Last year I had a blast joining my very first shop hop.  I was surprised how many quilt shops were hiding out there in the Maryland/Northern Virginia area.  This year the Quilters Quest promises to be as much fun as last year.

On Saturday, I grabbed a quilting buddy and we headed out to the first stop on my list for the day:  Traditions at the White Swan.  Since the shop hop is ten shops in ten days I didn't want to rush it so we decided to take it easy.  I only planned to hit three shops.  Traditions at the White Swan is over an hour from my house so we started that way and planned to stop at the other two shops on the way back.
This shop was filled with fat quarters, kits and some amazing people doing demos and talking about tools, books and techniques.
I filled my little basket with fat quarters that I intend to use on Bonnie Hunter's Mystery Quilt.  More about that as the Quest continues and I pick up more fabrics.  I'm going off-script with colors but I'm pretty excited about it.
While there I met a really fun and creative lady that is Cabin in the Woods Quilters.  Penni Domikis was great to meet and I really like her ideas on how to use up scraps with the tools we already have around the studio.  She shared stories about going to Quilt Market, a thing I hear about but will probably never get to go to.  If you are an Instagram user you should check out Penni's feed.  Loads of fun pictures to share.